
Knowledge & Innovation
Orthopedic Device Insights & Industry News
Explore technical articles, regulatory clearance strategies, design trends, and manufacturing innovations from Rebellion Solutions.
How to Design Medical Devices for Manufacturability
Table of Contents
A medical device can look elegant on a screen and still become difficult to build. A narrow channel may trap residue; a tiny snap-fit may crack during assembly; a tolerance that seems harmless can slow inspection. Medical Device Design for Manufacturability brings these practical realities into design decisions early, when changes are still manageable. It connects clinical needs with materials, processes, assembly, testing, and consistent production. The goal is not simply to make a device cheaper. It is to make its intended performance repeatable.
James G. Bralla, author of the Design for Manufacturability Handbook, is a recognized manufacturing-design authority. A concise paraphrase of the principle associated with his work is: “Design with the manufacturing process in mind, not as an afterthought.” That is a paraphrase, not a verified verbatim quotation. The distinction matters. DFM advice should be traceable, especially when design choices affect patient use and product quality.
This article outlines practical ways to apply the principle. It considers how to translate user needs into buildable features, select materials and processes, simplify assembly, and plan inspection. It also examines prototypes, supplier input, and design reviews. A molded housing, for example, may need draft angles and uniform wall thickness; a connector may need clear access for automated inspection. Small details can shape yield and reliability. Yet no checklist catches everything. Teams still need evidence from prototypes and production trials, and they should revisit assumptions when results disagree. The design is never finished merely because it can be manufactured once.
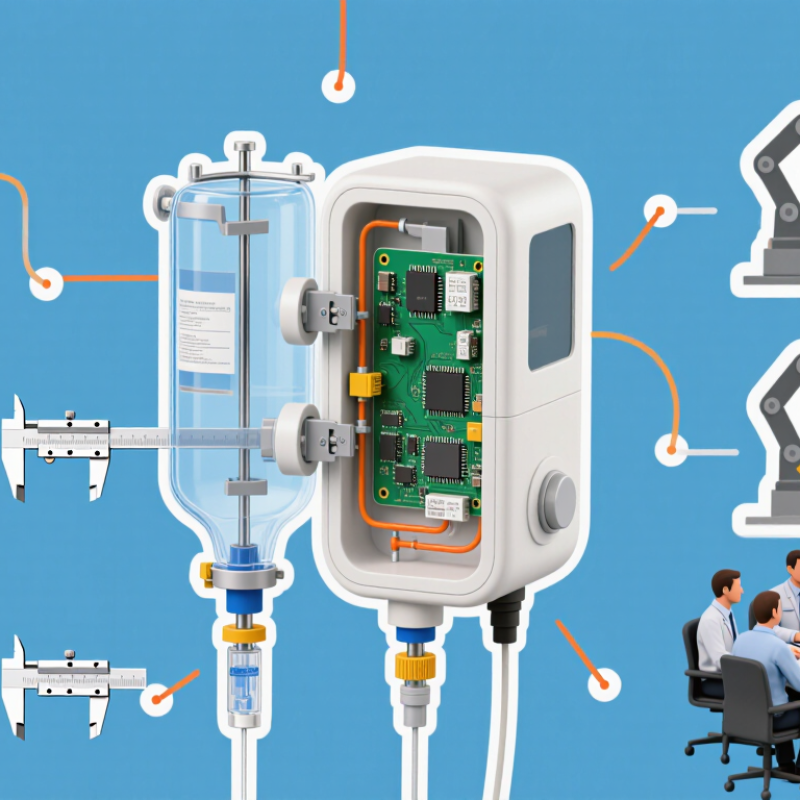
Define Clinical, Safety, and Regulatory Requirements
Define the clinical problem before choosing materials or components. Document the intended use, patient population, care setting, and people who will handle the device. Include foreseeable misuse, such as a connector being pulled at an angle during patient transfer. These details shape measurable requirements for performance, usability, and labeling.
Be specific. Replace “easy to clean” with a validated cleaning method, contact time, and acceptance limits. Clinical input matters here.
Translate safety concerns into design inputs and risk controls that can be verified. Consider electrical, mechanical, biological, software, and infection-control hazards when relevant. Set testable limits for features such as alarm response, enclosure strength, and material compatibility. Map each requirement to a test, inspection, or analysis, and keep its evidence traceable through design changes.
Regulatory expectations depend on intended use and target markets, so confirm applicable pathways and standards early with qualified specialists. A checklist alone is not proof.
Manufacturing teams should review whether suppliers can hold tolerances and inspections can detect defects consistently. Teams may underestimate variation between shifts; a pilot run can reveal gaps that a polished drawing hides.
Translate Device Requirements into a Manufacturable Design
A medical device requirement becomes useful when it can guide a design decision. “Easy to clean,” for example, needs practical detail: which surfaces are exposed, where fluid may collect, and how much access a user has. “Lightweight” should include a target mass and the conditions under which it is measured. Clear inputs help engineers compare materials, dimensions, and production methods without guessing.
Manufacturability belongs in those conversations early. A thin molded wall may reduce weight, but it can also warp or fill unevenly. A tight tolerance around a snap-fit may improve retention while making assembly less forgiving. Reviewing draft angles, parting lines, tool access, and assembly sequence can reveal these trade-offs before tooling begins. Small details matter. A connector placed near a housing edge, for instance, may simplify inspection but leave less room for a secure fastening feature.
Prototype builds can test whether the written requirements survive contact with real parts. Record fit problems, measured dimensions, and assembly time; then compare them with the original targets. Early drawings are often too optimistic. That discomfort is useful, though it can be easy to dismiss inconvenient findings as temporary. Revisit assumptions with manufacturing and quality teams, and revise requirements when evidence supports a change. The design should remain usable and reliable, not merely easy to produce.
Choose Materials and Manufacturing Processes
Medical device manufacturability begins with choosing materials that suit both the device’s function and its production method. A polymer may offer flexibility and low weight, yet change shape under heat or repeated loading. Stainless steel can provide strength, but thin features may require careful machining and deburring. Small details matter.
Assess the material in its finished state. Intended tissue contact, exposure duration, cleaning, and sterilization can all affect performance. A material that looks suitable on paper may behave differently after molding or repeated sterilization cycles. That gap deserves attention.
Choose the manufacturing process alongside the material. Injection molding can produce consistent plastic parts at volume, but wall thickness, draft angles, and gate locations influence quality. Machining offers control for precise features, though it can add time and material waste. Extrusion may suit long, uniform tubing, but tight dimensional tolerances need process controls. Ask manufacturers to review drawings early, including tolerances and inspection points. Prototype parts should use production-representative materials and processes where practical. A quick prototype can mislead. I have seen teams focus on a clever geometry and overlook how a tool would release the part. That is an easy mistake to make, and worth revisiting before designs are locked.
How to Design Medical Devices for Manufacturability - Choose Materials and Manufacturing Processes
| Material | Typical Device Uses | Common Manufacturing Processes | Manufacturability Considerations | Sterilization and Selection Notes |
|---|---|---|---|---|
| 316L stainless steel | Surgical instruments, fixation components, and reusable device parts | CNC machining, forming, investment casting, and laser cutting | Offers strength and corrosion resistance, but machining can require robust tooling and careful control of work hardening. Design for accessible tool paths and practical tolerances. | Often suitable for repeated steam sterilization when the alloy, surface finish, and device design are appropriate. Validate corrosion resistance and cleaning performance for the intended use. |
| Titanium alloy (for example, Ti-6Al-4V) | Orthopedic and dental implants, bone screws, and lightweight structural components | CNC machining, forging, powder-bed fusion, and other qualified metal additive processes | High strength-to-weight ratio and corrosion resistance can support compact designs. Machining heat and tool wear need management; additive parts may require support removal, finishing, and process-specific inspection. | Sterilization suitability depends on the finished device and validated process. For implants, assess surface condition, fatigue performance, and material traceability. |
| PEEK (polyether ether ketone) | Selected spinal and orthopedic components, instrument parts, and electrical insulators | Injection molding, CNC machining, and qualified additive manufacturing | Engineering-grade thermoplastic with high temperature capability. Molding requires controlled processing conditions; machining can produce burrs and residual stress, so finishing and inspection should be planned. | Some grades can tolerate steam sterilization, but performance depends on grade, part geometry, and repeated-cycle exposure. Verify dimensional stability and mechanical properties after the selected sterilization process. |
| Medical-grade silicone elastomer | Seals, tubing, respiratory components, and soft-contact parts | Liquid silicone rubber (LSR) injection molding, compression molding, and extrusion | Flexible and suited to complex molded shapes. Parting lines, flash, cure conditions, and bonding interfaces need attention; geometry should support reliable demolding and consistent wall thickness. | Steam, ethylene oxide, and radiation compatibility vary by formulation and device design. Confirm that the chosen method does not impair elasticity, color, or functional performance. |
| Polypropylene (PP) | Housings, fluid-handling components, containers, and single-use device parts | Injection molding, extrusion, and thermoforming | Often cost-effective for high-volume production. Mold shrinkage and warpage should be addressed in tooling design; snap-fits and living hinges require material- and geometry-specific validation. | Some grades and designs are compatible with steam sterilization. Radiation may affect color or mechanical properties, so validate the selected resin and finished component. |
| Polycarbonate (PC) | Transparent housings, connector components, and durable device enclosures | Injection molding, extrusion, and machining | Useful where impact resistance and transparency are needed. Molding conditions, gate location, and residual stress can affect optical quality and part performance; avoid sharp corners where practical. | Repeated steam exposure can cause stress-related damage in some parts, and radiation can cause yellowing or property changes. Select the sterilization route early and test representative finished parts. |
Selection note: Confirm that the specific material grade is appropriate for the device’s intended use, contact duration, manufacturing method, cleaning, and validated sterilization process. Assess applicable regulatory and biocompatibility requirements for the finished device.
Prototype and Test for Performance and Production
A medical device prototype should test more than whether it works once. It should reveal whether people can assemble, clean, and inspect it consistently. Build early units with production-intent materials, fasteners, and joining methods. Then record cycle time, dimensional variation, scrap, and points where operators need extra care. A click-fit housing may pass bench testing yet crack when repeatedly opened. That is useful evidence, not a failed project.
The FDA’s 2018 report, Medical Device Recalls: An Analysis of Quality Problems, examined 3,048 recalls and identified design-related problems in about 22 percent. That figure makes production-focused design reviews hard to postpone. Test prototypes under realistic conditions: repeated use, temperature changes, cleaning, and tolerance extremes. Ask manufacturing staff to assemble small pilot batches, not just review drawings. Measure fit with gauges; watch for awkward tool access and cables pinched beneath covers. And challenge the test setup. A fixture that holds every part perfectly can hide real-world variation. Early results are imperfect. Keep the raw observations, revise the design, and repeat the tests before scaling production.
Designing Medical Devices for Manufacturability
Prototype and test assembly performance as designs evolve toward production.
Illustrative engineering test data: average assembly time falls from 18.4 to 10.8 minutes per device across successive builds. Use repeated prototype builds to identify design features that complicate assembly, then verify improvements with production-intent parts and work instructions. Values are examples, not an industry benchmark.
Validate Production Methods and Plan for Scale-Up
A manufacturable design is not proven by a polished prototype. It is proven when production can repeat the same result across operators, shifts, and equipment. Identify candidate processes early, such as molding, machining, or adhesive bonding. Then test them against measurable requirements: dimensions, bond strength, leak rate, and visual defects. Tiny shifts matter.
Build pilot units using the equipment and work instructions planned for production. Record cycle time, yield, rework, and material variation. For a bonded assembly, test samples after realistic curing and handling—not just immediately after joining. Keep the raw data, including failed runs. Not yet. One successful lot is weak evidence if setup conditions were unusually favorable.
Before increasing volume, check whether suppliers can hold material specifications and whether fixtures support consistent assembly. Define acceptance limits and sampling plans before the next build, so teams do not adjust criteria after seeing results. Increase output in stages, reviewing defects and process capability at each step. Include operators in these reviews; awkward hand movements can reveal design problems that drawings miss. Scale-up plans often underestimate training time. That assumption deserves another look.
FAQS
Match material properties to the device’s function and manufacturing process. Check heat, repeated loading, tissue contact, cleaning, and sterilization. Paper specifications can miss real-world changes.
Molding or repeated sterilization may change performance. Test finished parts under realistic conditions, not just raw samples. The difference can be subtle.
Injection molding can produce consistent parts at volume. Wall thickness, draft angles, and gate locations affect quality. Small details matter.
Machining supports precise features, but may add time and material waste. Extrusion can suit long, uniform tubing; tight tolerances need process controls. It is not automatic.
Review tolerances and inspection points early. Check how tools release the part, too. I might overlook this if I focused only on geometry.
Build pilot units with planned equipment and work instructions. Measure dimensions, bond strength, leak rate, and visual defects across operators and shifts.
Record cycle time, yield, rework, and material variation. Keep failed-run data. One good lot is weak evidence.
Check supplier consistency, fixture performance, and operator training. Set acceptance limits and sampling plans before the next build. Review defects at each stage.
Conclusion
Medical Device Design for Manufacturability begins with a clear understanding of clinical needs, user safety, and applicable regulatory requirements. These considerations shape the device’s essential functions, performance targets, and design constraints. Translating them into a manufacturable design means simplifying components and assembly steps while preserving reliability, usability, and quality. Early collaboration among design, engineering, and production teams can help identify practical challenges before they become costly changes.
Material and process choices should suit the device’s intended use, performance needs, and production volume. Prototypes can then be tested to assess function, safety, and ease of manufacture, with findings used to refine the design. Before scaling up, teams should validate production methods, establish consistent quality checks, and plan for equipment, materials, and capacity. This structured approach helps create devices that meet user needs and can be produced reliably as demand grows.

Blog Tags: